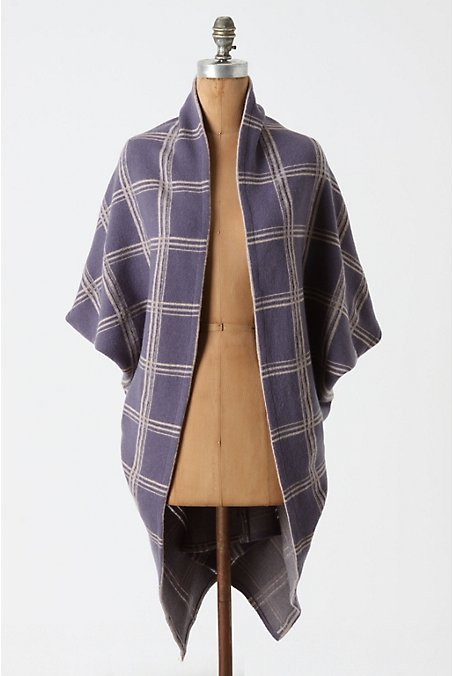
I stopped by Anthropologie the other day, just to see what was on sale and what this Spring is going to look like. I do shop there occasionally, but what with my whole "buy less, sew more" mantra these days, I am trying really super hard not to bring home anything I don't really really really need.
I did find something super darling, though! It's called the
Dalsland wrap, and there was only one of them in the store. I totally scoped it out, even sitting down on their couch to take measurements and figure out how they constructed this doohicky. It's made out of a lovely substantial doubleknit.


Then I came home and scoped it out online some more, and then I made a prototype out of cream organic cotton sweatshirt fleece on my shelf.


The great news is that out of ten reviews, it gets almost five stars! The bad news is the prototype doesn't fit me, sadly, but I learned a lot from it and in my second try ~ voila! My own personal version of the Dalsland shrug in alpaca/wool/nylon yardage from my own stash (plus), and the whole thing cost me $12 instead of $118 (another plus).
If there's anyone out there reading this who wears a size 4 or possibly 6 and wants the cream sweatshirt wrap, just send me an email and I'll mail it to you. Thanks, she found a home!
 Here's a quick tutorial
, with diagrams instead of pics because it's a tad confusing.
I am a tall size 8 or 10 in RTW, so these measurements are based off of that and off of the Medium sized shrug in the store. The prototype I made would fit someone with smaller shoulders, maybe a 4-6?
You need a long strip of fabric, 24" wide by 116" long. I cut two pieces of sweater knit, each 24" wide by 58" long. Serge all four long edges. If you're buying yardage, that means you will need 1 1/3 of 60" wide fabric, and cut it in half.
Because I didn't have one continuous piece of fabric 100" long, I seamed my two 58" pieces in the middle, and made it a flat-fell seam because you may be able to see it when or if it folds over. This is optional (the flat-fell part, you really do need a seam).

Then fold the piece, right sides together, at the center back seam. You will be stitching closed the bottom 20".


Now for the hardest part, and it's not too hard. You will open up the piece by holding the center back seam and the seam you've just sewn in each hand, right sides together, matching the two seams up and pinning them together. Leave 9" (or more, this becomes your sleeve opening) open at each end, and stitch this seam closed.

To finish, turn under the serged edges 1/2" and stitch the hems down. I also stitched down a 1/2" around the armholes.
This is the easiest project! The hardest part is envisioning the "envelope" when you pull the two seams to the sides. The great thing about the Anthro site is you can zoom in on their finished product and actually see some of the construction of it.

I'd love to see if anyone else makes one of these wrap/shrugs/cardi/thingies!

Enjoy!
**Edit: I've added some additional thoughts on sizing and fabrics in a second post,
here.